(!)Due to Microsoft's end of support for Internet Explorer 11 on 15/06/2022, this site does not support the recommended environment.

ideanote
inCAD Library

Please read before use

What is inCAD Library?

  • Helpful application examples for mechanical engineers.

The Concept of inCAD Library

  • Online application library with a range of ideas for all manufacturing industries.
  • Save design time and learn new design applications when you are concepting new machines.

Disclaimer

  • MISUMI may not offer all parts in each application design. Available parts can only be purchased separately not as a unit shown in each application design.
  • MISUMI does not guarantee quality, accuracy, functionality, safety or reliability for the combination of the parts in each application example. Accept these points prior to use.
  • 2014 Copyright MISUMI
  • The data cannot be used for any purposes (including sales promotion) except for designing your machine.
  • All associated CAD is free. Misumi reserves the right at its sole discretion to cancel, terminate or modify this offer.
  • MISUMI may change, add or delete application examples posted without prior notice.
  • MISUMI assumes no responsibilities for any damage incurred resulting from your use of the Service or any change, addition or deletion by MISUMI of the application examples for any reason whatsoever.

inCAD Library Features

  1. Get great new design ideas for these application examples.
  2. Over 300 design application ideas
    collected from dozens of industries!

  3. Find application examples quickly! Search by function, workpiece shape, etc.

  4. Download the CAD models for each application example.
  5. Log in to download free CAD models.
    Download CAD for the entire application example!

Good IDEA! button

Click the Good IDEA! Button when you like an application example!

*Can only be clicked once per application example.

  • Upper right corner on the page of application example details

  • Pop-up dialog for CAD data downloading

Page top

Keyword Search
No. Search

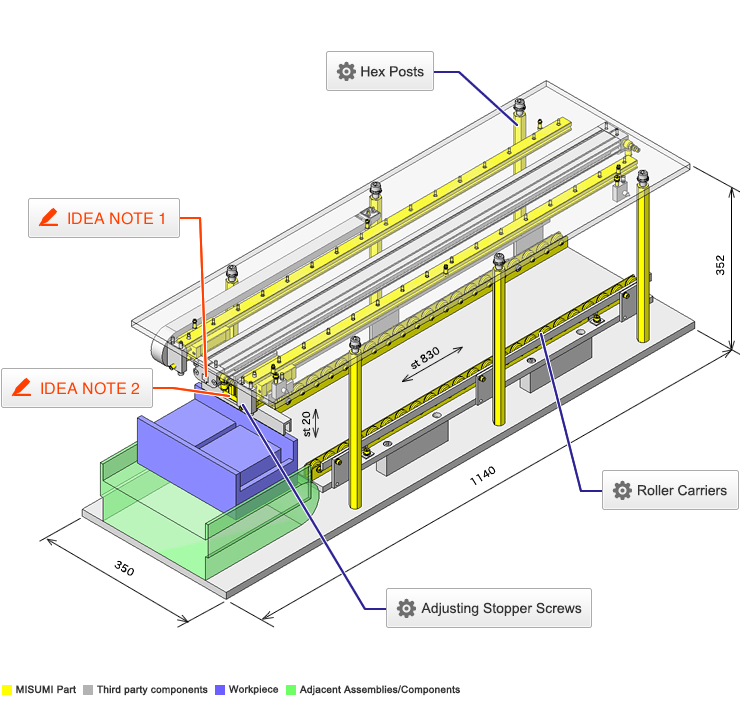
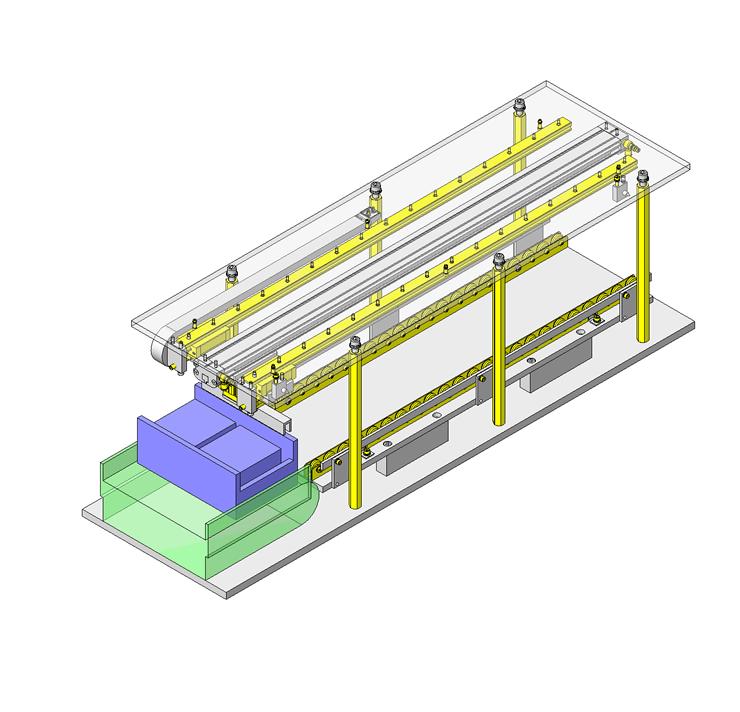
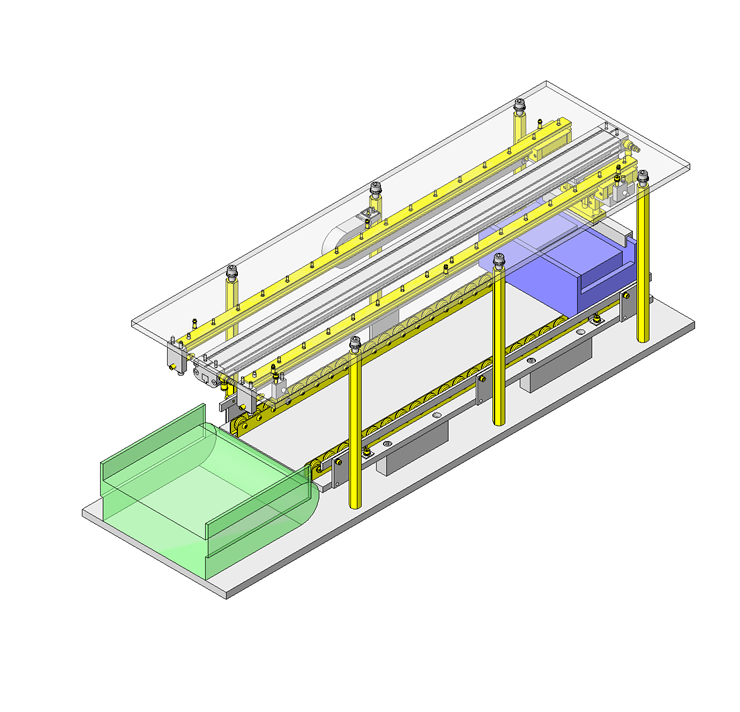
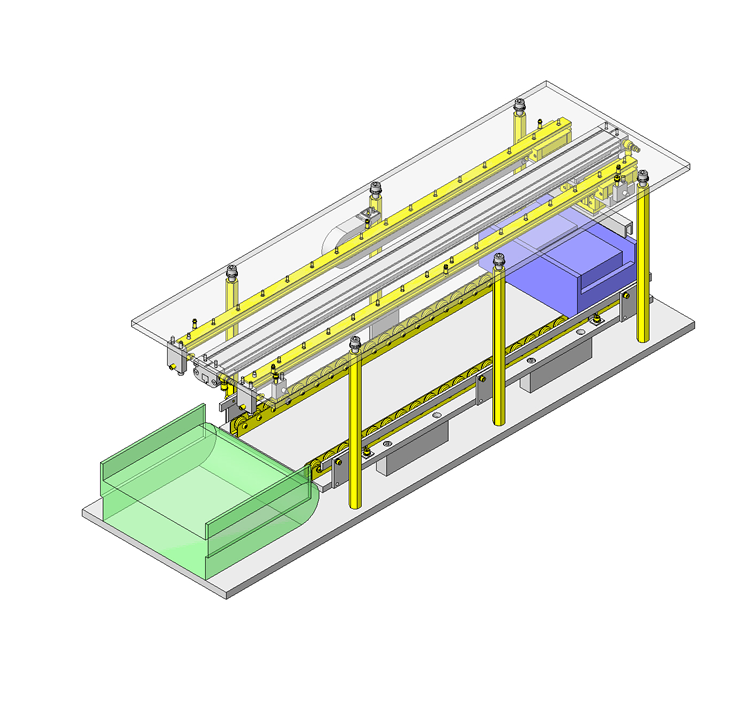
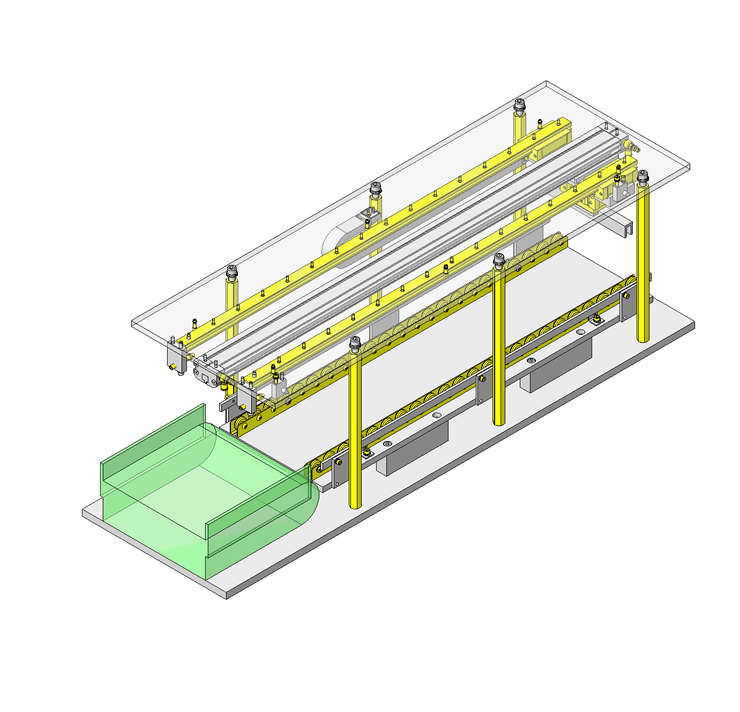
No.000192 Lead-in conveyor

Accessing from above the workpiece and transporting with a cylinder.

Relevant category

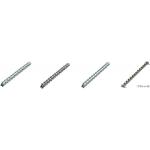
Roller Carriers

Product name Roller Carriers - 7~9mm Width
Part number CROJS23
* Orange colored cells in the table below indicate the part numbers used in this example.

Selection criteria

Relatively inexpensive transport method without a drive

Back to page top

Available sizes

■Roller Carriers - 7~9mm Width

Roller Type Roller
Pitch
Material Overall Width Overall Height Roller Frame
Roller Bearing Frame Screw / Nut O.D. Width Height Width
Milled Rollers 35 Polyacetal Stainless Steel 29 30 φ26 7 25 7

■Sizes

Number of
Wheels
(Overall Length) Load Capacity(N)
2 68 392
3 103 588
4 138 784
5 173 980
6 208 1176
7 243 1372
8 278 1568
9 313 1764
10 348 1960
11 383 2156
12 418 2352
13 453 2548
14 488 2744
15 523 2940
16 558 3136
17 593 3332
18 628 3528
19 663 3724
20 698 3920
21 733 4116
22 768 4312
23 803 4508
24 838 4704
25 873 4900
26 908 5096
27 943 5292
28 978 5488
29 1013 5684
30 1048 5880
31 1083 6076
32 1118 6272
33 1153 6468

* Loading weight is 196N per wheel.

Back to page top

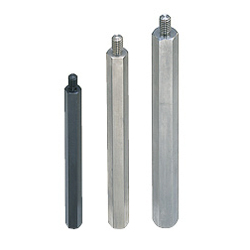
Hex Posts

Product name Hex Posts - One End Threaded, One End Tapped, Standard L Dimension
Part number SLSBG19-325-M10-N10
Features L dimension and thread diameter are also selectable.
* Orange colored cells in the table below indicate the part numbers used in this example.

Selection criteria

Popular Post to Support a Top Panel

Back to page top

Available sizes

■Hex Posts - One End Threaded, One End Tapped, Standard L Dimension

Material Surface Treatment
1018 Carbon Steel
Black Oxide
Electroless Nickel Plating
Trivalent Chromate(Black)
304 Stainless Steel

■Sizes

Hex Size Post Length Thread Dia. (coarse) / Tap Dia. (coarse) - Select for each end Tap Depth Thread Length
0.5 mm increments M4 M5 M6 M8 M10 M12 M16 M20 M24
10 25〜350 Tap Dia. x 2 Thread Dia. x 1.5
12 25〜400
13 30〜400
14 35〜500
17 35〜500
19 45〜500
24 55〜600
27 65〜700
30 80〜800
32 80〜800

Back to page top

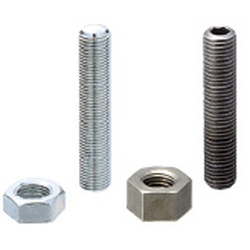
Adjusting Stopper Screws

Product name Adjusting Stopper Screws- Hexagon Socket, L Configurable, Fine Thread
Part number SANB8-45
* Orange colored cells in the table below indicate the part numbers used in this example.

Selection criteria

Easy-to-handle bolts are used to adjust the loading position.

Back to page top

Risk info.

Adjustment Difference When Using 2 pcs

Back to page top

Available sizes

■Adjusting Stopper Screws- Hexagon Socket, L Configurable, Fine Thread

Adjusting
Screw Type
Material Hardness Surface Treatment Accessory(Nut x 1 pc.)
Material Surface Treatment
Fine Thread 1045 Carbon Steel 45〜50HRC Electroless Nickel Plating 1018 Carbon Steel Trivalent Chromate
Trivalent Chromate
4137 Alloy Steel 50HRC〜
304 Stainless Steel 304 Stainless Steel
420 Stainless Steel 45HRC〜
Coarse Thread 1045 Carbon Steel 45〜50HRC Electroless Nickel Plating 1018 Carbon Steel Trivalent Chromate
4137 Alloy Steel 50HRC〜 Trivalent Chromate
304 Stainless Steel 304 Stainless Steel
420 Stainless Steel 45HRC〜

■Sizes and Dimensions

Thread Dia. x Pitch Overall Length Tip R
Fine Thread Coarse Thread 10 15 20 25 30 35 40 45 50 60 70 80 90 100
M4×0.5 M4×0.7 4
M5×0.5 M5×0.8 5
M6×0.75 M6×1.0 6
M8×0.75 M8×1.25 8
M10×1.0 M10×1.5 10
M12×1.0 M12×1.75 12

Back to page top

IDEA NOTE Transportation from above by using a roller carrier

Transporting workpiece from above is effective for cases where no space is available at the bottom.

IDEA NOTE Adding a backup plate

A Back plate is added to the back of the cap for reinforcement.

  • TERMS AND CONDITIONS FOR USE OF CAD DATA
    Your access to the CAD data that MISUMI Corporation (hereinafter referred to as the Company) posts on this site (including 3D CAD data, intermediate 3D CAD data and 2D CAD data; hereinafter referred to as the Data) are of products manufactured and/or sold by the Company (hereinafter referred to as the Products) assumes that you have read and accepted these terms and conditions which govern your use of the Data. If you do not agree to these terms and conditions, you must stop using this website and the Data. You must not use the Data for any unlawful purpose or in any manner inconsistent with these terms and conditions.
    1. CAD Data
    The Data is prepared for assisting the Company's users in the CAD design process by providing dimensions and other Product information. In order to provide the best speed and stability working within this site, the Product drawings were simplified to reduce the size of the Data. For instance, some of the Products are shown without the oil groove shape, screws or spring shape. Also, please be aware that the tolerance, surface roughness and/or chamfer of the Data may vary from the actual Products.
    2. Disclaimer on Data
    While the Company has carefully prepared the Data, accuracy of the Data is not guaranteed and is subject to the variances as described above. The Company may also modify, add or delete the Data at any time without prior notice. The Company assumes no liability for any direct, indirect, consequential or special damages that you may claim resulted from your use of the Data or any changes to or deletions of the Data regardless of the reason. The Company provides no warranty as to the quality, accuracy, functionality, safety or reliability of the combination of Products and parts. Example applications and combinations of the Products are provided for illustrative purposes only.
    3. Copyright
    Copyrights to the content and the Data belong to the Company or the manufacturers of the Products. The said copyright is protected by the Copyright Act and international treaties. The use (including duplication, modification, uploading, posting, transmission, distribution, licensing, sales and publishing) of the Data except for the purpose to use the Data described above without prior approval of the Company is not allowed. The Data cannot be used for any purposes (including sales promotion) except for designing your machine. If you violate this provision or the laws or regulations, the Company may prohibit you from the use of the Data, the Company’s site and/or take legal action. So long as you comply with these terms and conditions, the Company grants to you a non-exclusive, non-transferable, revocable license to access and use the Data for the sole purpose of assisting you in designing machines that incorporate products.
    In case that the CAD data is found to have been to be used for any purpose other than mentioned above or against the related laws, MISUMI may take legal actions, including the one for blocking the involved user from using CAD data and from accessing to the MISUMI site.
    4. Disclaimer of Warranty
    ANY AND ALL CONTENT APPEARING ON THIS WEB SITE IS PROVIDED FOR INFORMATIONAL PURPOSES ONLY. THIS WEB SITE, ITS CONTENT AND ITS LINKS ARE PROVIDED ON AN "AS IS" AND "AS AVAILABLE" BASIS AND ARE USED ONLY AT YOUR SOLE RISK, TO THE FULLEST EXTENT PERMISSIBLE BY LAW. THE COMPANY DISCLAIMS ALL WARRANTIES, EXPRESS OR IMPLIED, OF ANY KIND, REGARDING THIS WEB SITE (INCLUDING ITS CONTENT, HARDWARE, SOFTWARE AND LINKS), INCLUDING AS TO FITNESS FOR A PARTICULAR PURPOSE, MERCHANTABILITY, TITLE, NON INFRINGEMENT, RESULTS, ACCURACY, COMPLETENESS, ACCESSIBILITY, COMPATIBILITY, SECURITY AND FREEDOM FROM COMPUTER VIRUS. THE COMPANY WILL NOT BE LIABLE FOR ANY DAMAGES OR LOSSES, INCLUDING DIRECT, INDIRECT, CONSEQUENTIAL, SPECIAL, INCIDENTAL OR PUNITIVE DAMAGES AND/OR LOST PROFITS, IN CONNECTION WITH USE OF THE INTERNET, THIS WEB SITE, ITS CONTENT OR ITS LINKS
    Further, the Company will not be liable to you for any failure or delay by the Company to provide access to the Data or any of its obligations under these terms and conditions where such failure or delay is the direct or indirect result of any circumstances beyond the Company's reasonable control (and the Company's obligations will be suspended for the duration of such circumstances).

    CAD Download (Unit Assembly)

    CAD Download: File Format
    生成

    Thank you for downloading the data.

    Click the Good IDEA! button when you find interesting design tips.


    This data is utilized in order to list more useful application examples in the future.

    CAD Data Limitations

    1. Assembly data shows the assembly drawings in the concept design phase. The sole purpose of the data is to explain the structure and functionality of the assembly and is not considered nor to be used as a final design.
      You will need to edit the Data so that it meets your specific design conditions.
    2. Unit assembly Data consists of some sub-assemblies.
      It is configured so that each sub-assembly unit can be used as it is or edited.
    3. * The part in the frame is a sub-assembly unit.

    4. The Data for fabricated parts is based on easy-to-edit dimensions and shapes in sketches and histories.
    5. The Data including the third-part components are made by the Company.

    Page top

  • * Unit assembly Data consists of some sub-assemblies.
       It is configured so that each sub-assembly unit can be used as it is or edited.

Application Overview

Purpose

  • Transferring a workpiece using a cylinder rather than a motor.
  • Visual inspection for defective workpiece.
  • Parts are transported to a position accessible by the operator for inspection.

Points for use

  • Space Savings.
  • Workpiece is detected by a proximity sensor before and after lead-in.

Target workpiece

  • Plastic box
  • External dimensions: W100x D100x H70mm (2 pieces)
  • Pallet
  • External dimensions: W240xD150xH95mm
  • Weight: 10kg

Design Specifications

Operating Conditions or Design Requirements

  • Rod-less cylinder stroke: 830mm
  • Guided cylinder stroke:20mm
  • External dimensions: W1140xD350xH352mm

Selection Criteria for Main Components

  • Roller carrier
    • Selected as a conveyor without drive.
  • Linear guide
    • The moment load is not large, and therefore, select the one best suited for the whole device size.
  • Rod-less cylinder
    • Selected for conducting transportation.
  • Adjusting Stopper Screws
    • Select a stopper screw that is capable of fine adjustment to securely hold the workpiece.

Design Evaluation

Verification of main components

  • Select each cylinder (guided and rod-less) from workpiece gripping force and workpiece transportation load.
  • Guided cylinder
    • Select a cylinder that can withstand the workpiece load
    • Force needed to grip the workforce = Cap weight
      =0.2kg=2N・・・①
    • Cylinder thrust = Load factor x Operation Pressure x Tube I.D. Cross Section
      =0.5×0.4MPa×π/4×20mm×20mm
      =62.8N > 2N (= ①)
      ⇒Thus, select a cylinder with φ 20mm.
  • Rod-less cylinder
    • Force necessary for transportation = weight of object to be transported x friction coefficient of roller carrier
      =10kg×0.03
      =0.3kg=3N・・・②
    • Cylinder thrust = Load factor x Operation Pressure x Tube I.D. Cross Section
      =0.5×0.4MPa×π/4×25mm×25mm
      =98N>3N(= ②)
      ⇒Thus, select a cylinder with φ 25mm.

Other Design Consideration

  • Transportation is possible with access from above the workpiece. Effective for cases where no space is available at the bottom.
  • A proximity sensor, for which post assembly installation and removal is possible, is used for the sensor of the rod-less cylinder, aiming at workability improvement.
    When the sensor attached to the rod-less cylinder is used, the sensor is difficult to adjust because of LM guides mounted on the right and left sides.
  • In this case, mounting the proximity sensor outside the linear guides aims at workability improvement.

Explore Similar Application Examples

Page 1 / 31

Part List

No. Part Name Sample Picture MISUMI Part Number
(click the Part Number below for details)
Quantity
1 Roller Carriers - 7~9Mm Width CROJS23 2
2 Air Cylinders With Twin Guides MGCLF20-20 1
3 Linear Guides SXR33-940 2
4 Sensors for Air Cylinders MD11L3 2
5 Rack Gears SLSBG19-325-M10-N10 6
6 Locating Pins SJPDTA6-8 6
7 Flow Rate Control Valves SPSNL6-1 4
8 Extra Low Head Cap Screws CBSTS5-12 4
9 Socket Head Cap Screws-with Washer SCBS6-12 4
10 Socket Head Cap Screws-with Washer SCBS5-20 4
11 Socket Head Cap Screws-with Washer SCBS5-15 2
12 Socket Head Cap Screws-with Washer SCBS5-12 24
13 Socket Head Cap Screws-with Washer SCBS4-10 4
14 Socket Head Cap Screws-with Washer SCBS3-8 8
15 Hex Socket Set Screws MSSU4-8 2
16 Screw Stopper SANB8-45 2
17 Stop Pins SSTEH10 2
  • The part list above only contains MISUMI parts.
    Part list download (CSV) includes MISUMI and third party components used in this example.
  • TERMS AND CONDITIONS FOR USE OF CAD DATA
    Your access to the CAD data that MISUMI Corporation (hereinafter referred to as the Company) posts on this site (including 3D CAD data, intermediate 3D CAD data and 2D CAD data; hereinafter referred to as the Data) are of products manufactured and/or sold by the Company (hereinafter referred to as the Products) assumes that you have read and accepted these terms and conditions which govern your use of the Data. If you do not agree to these terms and conditions, you must stop using this website and the Data. You must not use the Data for any unlawful purpose or in any manner inconsistent with these terms and conditions.
    1. CAD Data
    The Data is prepared for assisting the Company's users in the CAD design process by providing dimensions and other Product information. In order to provide the best speed and stability working within this site, the Product drawings were simplified to reduce the size of the Data. For instance, some of the Products are shown without the oil groove shape, screws or spring shape. Also, please be aware that the tolerance, surface roughness and/or chamfer of the Data may vary from the actual Products.
    2. Disclaimer on Data
    While the Company has carefully prepared the Data, accuracy of the Data is not guaranteed and is subject to the variances as described above. The Company may also modify, add or delete the Data at any time without prior notice. The Company assumes no liability for any direct, indirect, consequential or special damages that you may claim resulted from your use of the Data or any changes to or deletions of the Data regardless of the reason. The Company provides no warranty as to the quality, accuracy, functionality, safety or reliability of the combination of Products and parts. Example applications and combinations of the Products are provided for illustrative purposes only.
    3. Copyright
    Copyrights to the content and the Data belong to the Company or the manufacturers of the Products. The said copyright is protected by the Copyright Act and international treaties. The use (including duplication, modification, uploading, posting, transmission, distribution, licensing, sales and publishing) of the Data except for the purpose to use the Data described above without prior approval of the Company is not allowed. The Data cannot be used for any purposes (including sales promotion) except for designing your machine. If you violate this provision or the laws or regulations, the Company may prohibit you from the use of the Data, the Company’s site and/or take legal action. So long as you comply with these terms and conditions, the Company grants to you a non-exclusive, non-transferable, revocable license to access and use the Data for the sole purpose of assisting you in designing machines that incorporate products.
    In case that the CAD data is found to have been to be used for any purpose other than mentioned above or against the related laws, MISUMI may take legal actions, including the one for blocking the involved user from using CAD data and from accessing to the MISUMI site.
    4. Disclaimer of Warranty
    ANY AND ALL CONTENT APPEARING ON THIS WEB SITE IS PROVIDED FOR INFORMATIONAL PURPOSES ONLY. THIS WEB SITE, ITS CONTENT AND ITS LINKS ARE PROVIDED ON AN "AS IS" AND "AS AVAILABLE" BASIS AND ARE USED ONLY AT YOUR SOLE RISK, TO THE FULLEST EXTENT PERMISSIBLE BY LAW. THE COMPANY DISCLAIMS ALL WARRANTIES, EXPRESS OR IMPLIED, OF ANY KIND, REGARDING THIS WEB SITE (INCLUDING ITS CONTENT, HARDWARE, SOFTWARE AND LINKS), INCLUDING AS TO FITNESS FOR A PARTICULAR PURPOSE, MERCHANTABILITY, TITLE, NON INFRINGEMENT, RESULTS, ACCURACY, COMPLETENESS, ACCESSIBILITY, COMPATIBILITY, SECURITY AND FREEDOM FROM COMPUTER VIRUS. THE COMPANY WILL NOT BE LIABLE FOR ANY DAMAGES OR LOSSES, INCLUDING DIRECT, INDIRECT, CONSEQUENTIAL, SPECIAL, INCIDENTAL OR PUNITIVE DAMAGES AND/OR LOST PROFITS, IN CONNECTION WITH USE OF THE INTERNET, THIS WEB SITE, ITS CONTENT OR ITS LINKS
    Further, the Company will not be liable to you for any failure or delay by the Company to provide access to the Data or any of its obligations under these terms and conditions where such failure or delay is the direct or indirect result of any circumstances beyond the Company's reasonable control (and the Company's obligations will be suspended for the duration of such circumstances).

    CAD Download (Unit Assembly)

    CAD Download: File Format
    生成

    Thank you for downloading the data.

    Click the Good IDEA! button when you find interesting design tips.


    This data is utilized in order to list more useful application examples in the future.

    CAD Data Limitations

    1. Assembly data shows the assembly drawings in the concept design phase. The sole purpose of the data is to explain the structure and functionality of the assembly and is not considered nor to be used as a final design.
      You will need to edit the Data so that it meets your specific design conditions.
    2. Unit assembly Data consists of some sub-assemblies.
      It is configured so that each sub-assembly unit can be used as it is or edited.
    3. * The part in the frame is a sub-assembly unit.

    4. The Data for fabricated parts is based on easy-to-edit dimensions and shapes in sketches and histories.
    5. The Data including the third-part components are made by the Company.

    Page top

Page top

Loading...